Import a statement is where your bank lines come from. You upload the complete export from your bank, as a CSV or an Excel (.xlsx) file, unfiltered and unedited, so that the record matches what the bank holds.
- On your bank's website, export the whole statement period as a CSV file. An Excel (.xlsx) file works too.
- Open Banking and press Import a statement. It sits in the title row of the account page, and under "No bank account yet" when you have none. It is also in the New menu.
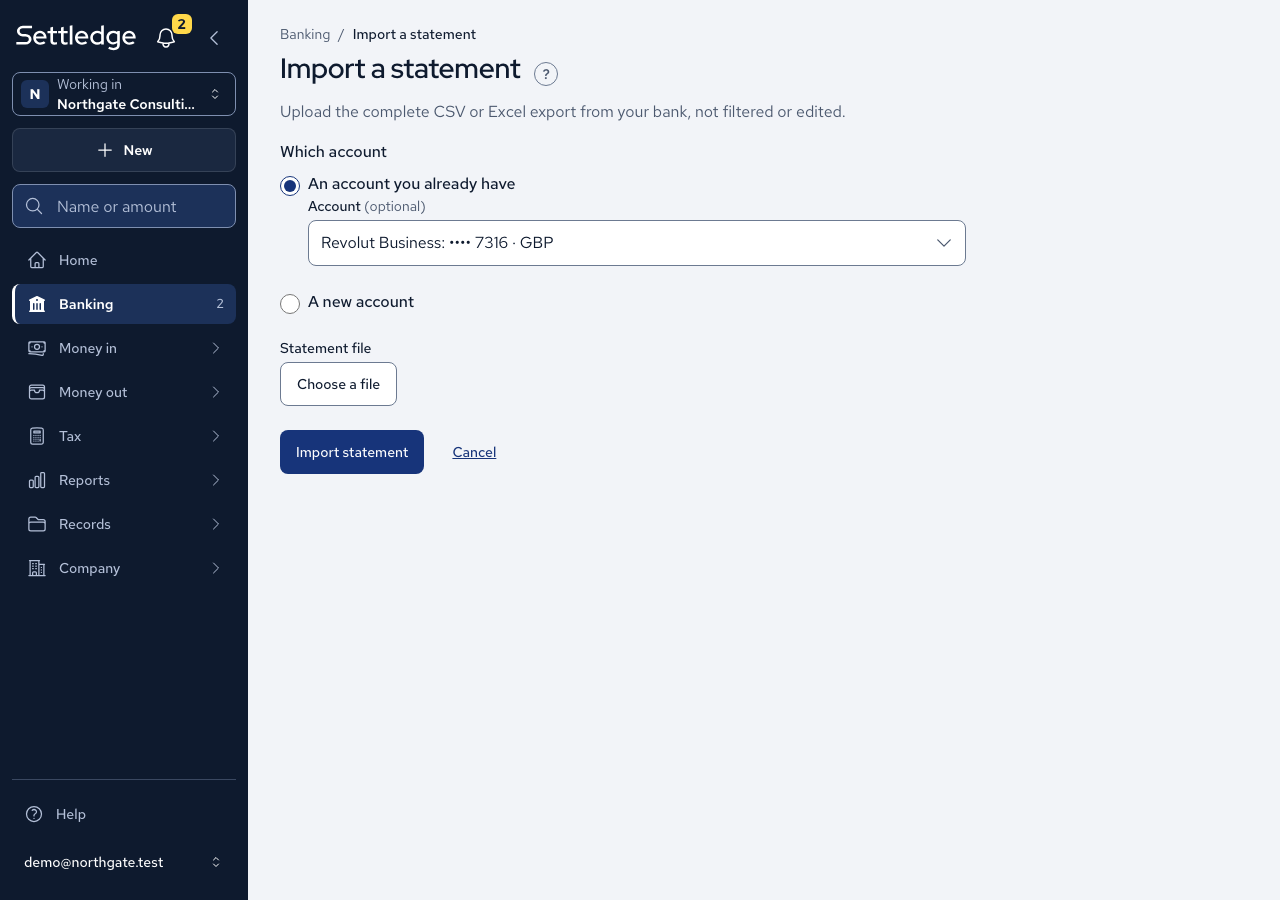
- Under Which account, choose An account you already have, or A new account and fill in Account name, Bank and Currency. Last 4 digits is optional, though it helps you tell accounts apart later.
- Under Statement file, press Choose a file, pick your CSV or Excel file, then press Import statement.
- If the app does not recognise your bank's column headings, Check the columns shows the first five rows. Confirm which column is the date and which holds the amount, then press Confirm and import. A mapping with no amount column is refused, and the app remembers your choice for that account.
- Import result tells you how many rows were read, imported and rejected, and which dates they cover. Press View transactions to see your bank lines.
Cases
- Uploading the same file twice imports nothing new, and the result tells you the file was already imported and when.
- A statement that overlaps an earlier one imports only the new lines.
- A row with an amount such as 12.345, or a date that does not exist, is rejected with its row number and the reason. The other rows still import.
- An Excel (.xlsx) file imports the same lines as the same statement saved as CSV.
- Only the first sheet of an Excel file is read. The other sheets are named after the import as "Other sheets not read".
- Dates are read as the sheet shows them, the same as in a CSV saved from it.
- An .xls, .xlsm or .xlsb file is refused by name, and the message says the app takes .xlsx and CSV files.
- A password-protected Excel file is refused. Save a copy without a password as .xlsx or CSV.
- An Excel file saved with a .csv name is still refused, and you are asked to export the statement as CSV instead.
- A file over the size limit is refused before it is read, and the message states the limit.
- A file with a header and no transactions imports nothing, and this is not treated as a failure.
- A fee charged on a payment becomes its own transaction, so you may see more transactions than rows.
- Money out is negative and money in is positive. Two identical payments on one day are both kept.
- A statement can also be handed over on Hand over files. Pressing Add to your books puts its lines in the right account, and makes one named after the bank the file shows if you have none.
- A statement the hand-over cannot place in an account waits there, and you import it from Banking instead.
Good practice
- Upload the complete export each time. Overlaps and repeats are safe, because nothing is imported twice.
- Correct any rejected rows in your export and upload the file again. Lines already imported are not duplicated.
- Imported lines cannot be edited or deleted afterwards, so check the file before you confirm.
- An imported line is not a VAT figure. It counts towards turnover only once you have categorised it.